Virtual machines are the core building block of Lightspeed Cloud. This guide covers the full lifecycle: creating a VM, changing its resources, and everyday management tasks.
Creating a VM
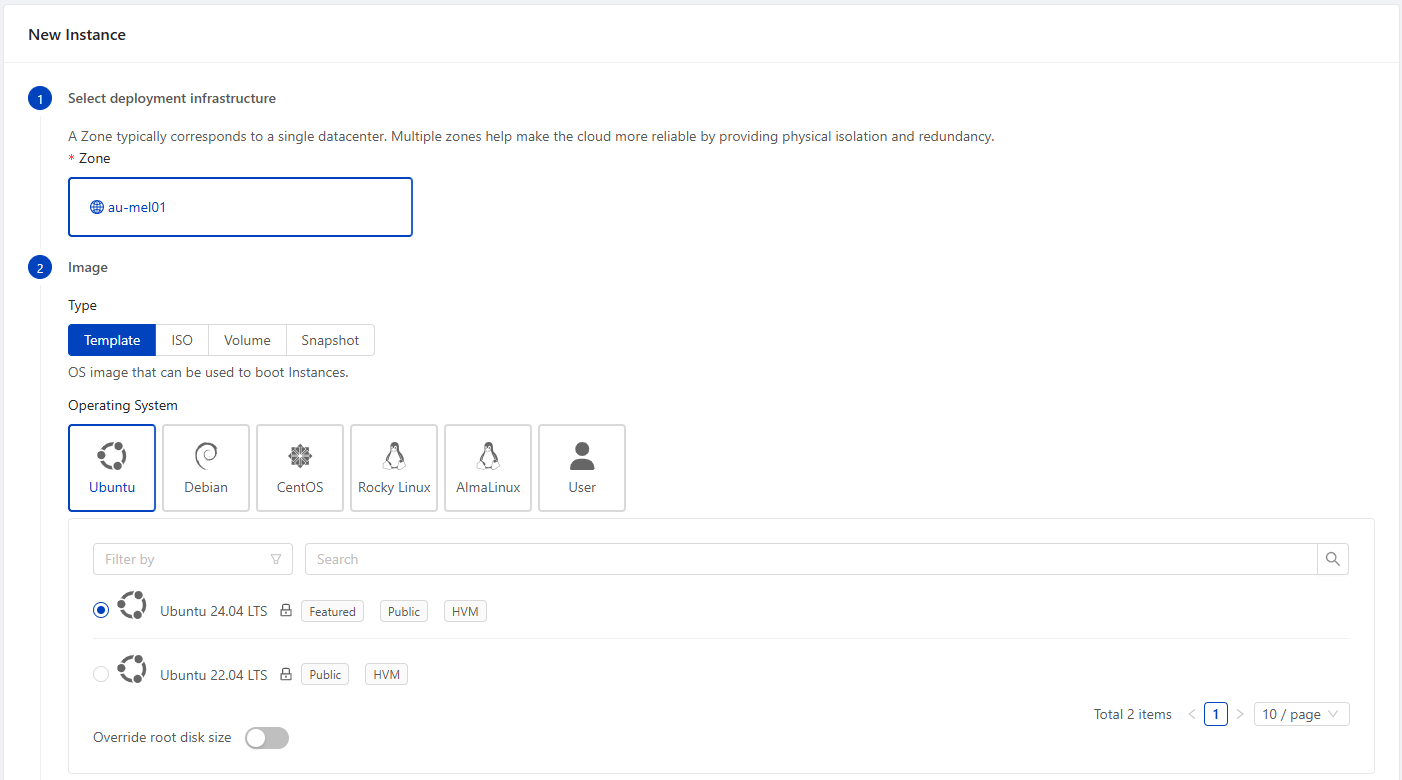
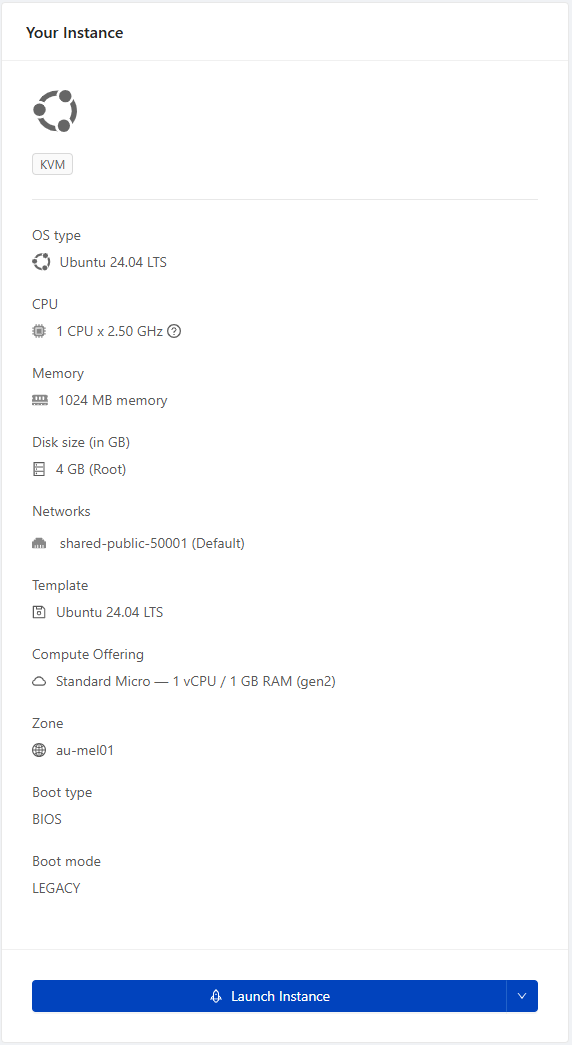
From the portal, choose Compute → Instances → Add Instance. You'll be asked to pick:
- The deploymeny infrastructure - A zone - the data centre location your VM will run in
- An image - the operating system image, ISO, source volume or Snapshot to boot from (see Templates & ISOs)
- Based on the image source you've chosen, you'll then be required to select an Operating System, ISO to mount during boot, existing volume or snapshot.
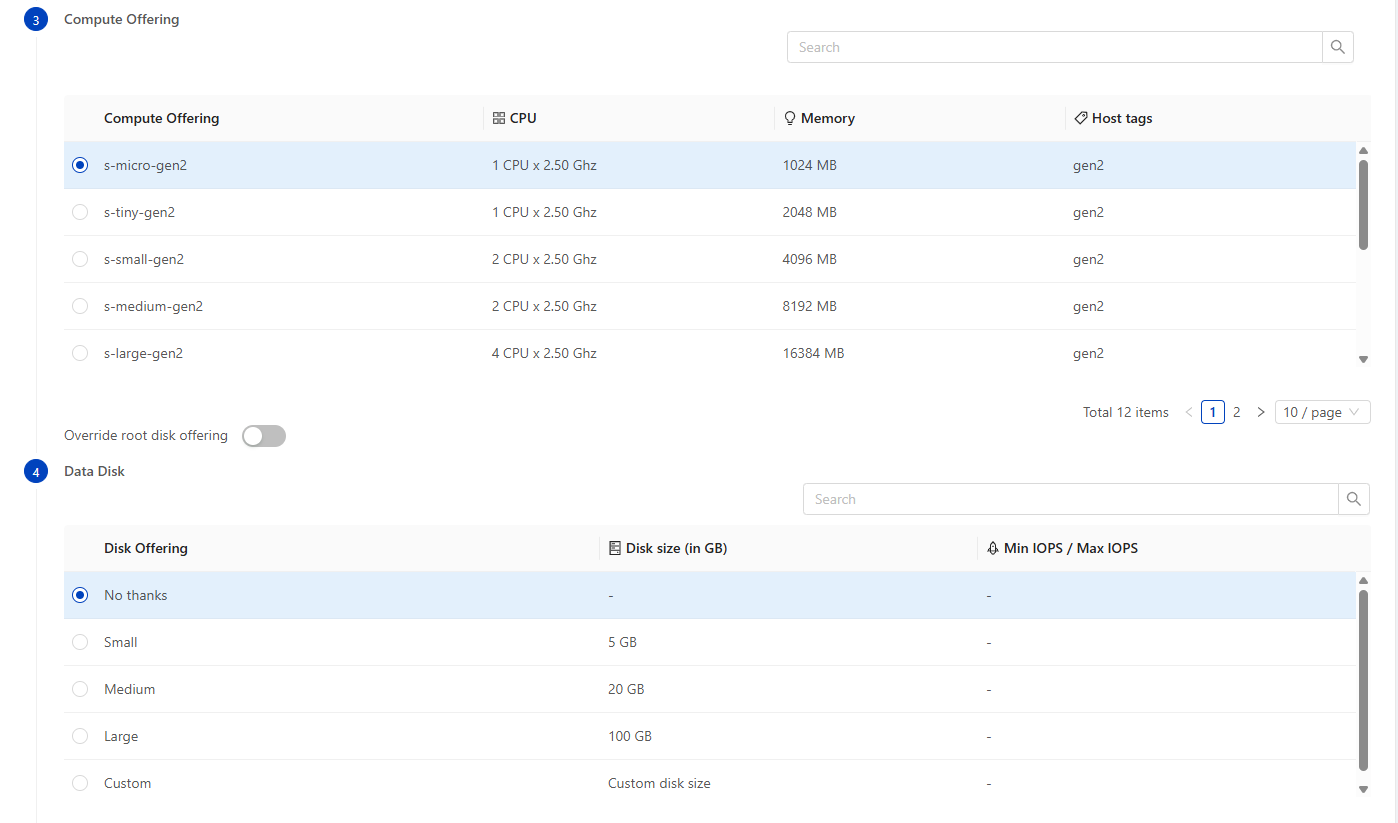
- A compute offering - the CPU/RAM plan
- It is strongly recommended to Override the root disk size to ensure there is enough storage room for your machine's intended use. The default size is 20GB, however can be adjusted after creation.
- A data disk offering - an optional addition to the root disk.
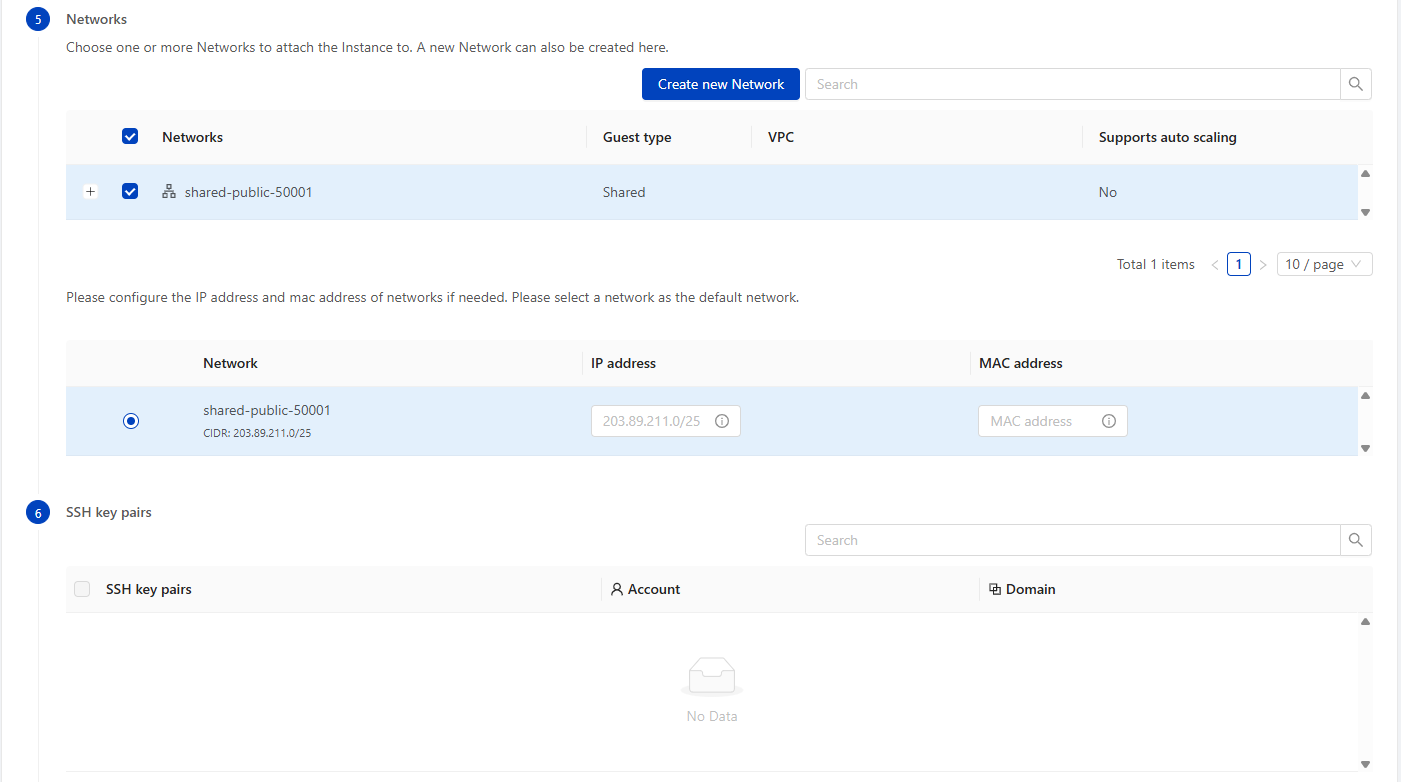
- A network to attach the VM to.
- For simple deployments with only one machine - or where every machine you deploy requires a unique public IP address, the exist shared-public Network is a suitable option.
- If you intend on deploying:
- A private network with a single subnet, NAT gateway, port-forwarding, load balancing, etc; then using the Create new Nework feature and creating an Isolated network would be recommended.
- A Virtual Private Cloud - with a hierarchy of multiple subnets, NAT gateway, port-forwarding, load balancing, etc; then following the guide in VPC & Advanced Networking would be recommended.
- An SSH keypair for access, and optionally custom user data (see below)
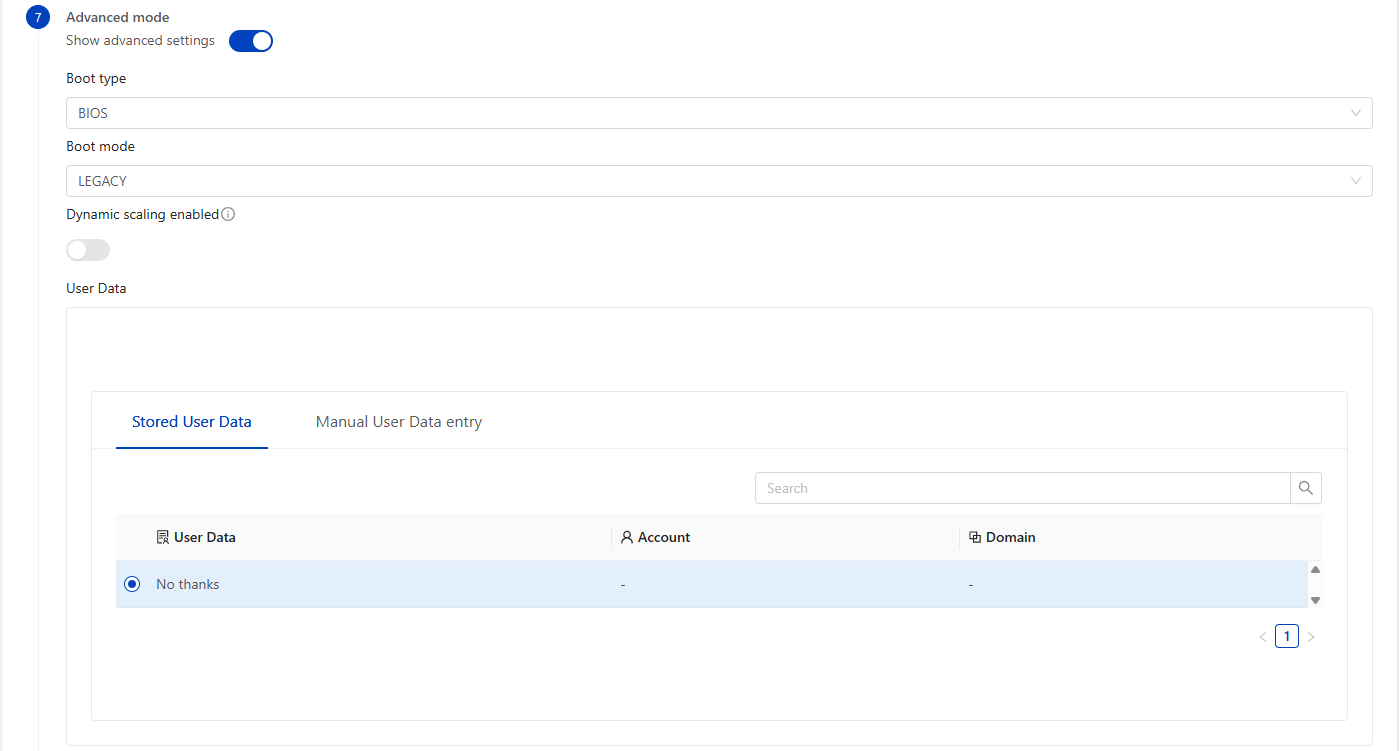
- Advanced Mode to adjust:
- Boot type (BIOS or UEFI),
- Enable dynamic scaling (requires your own developed images),
- Add Cloudinit user data (for preconfiguring machines during deployment)
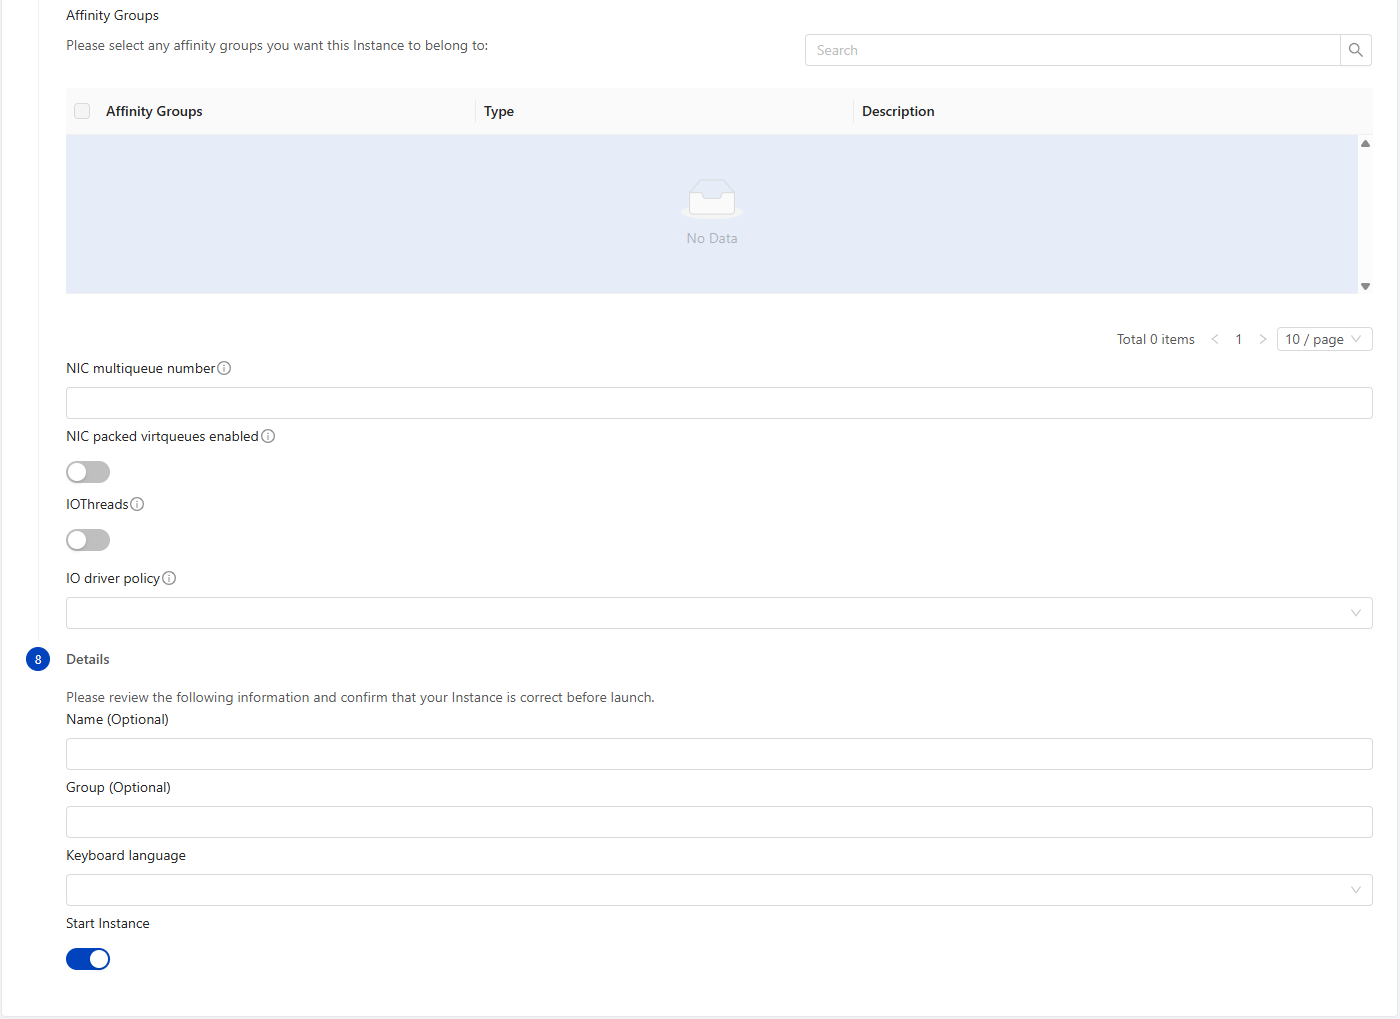
- Affinity Groups - to set machines to either stay together on a single physical host (affinity), or remain on different physical hosts (anti-affinity),
- NIC Multiqueue - allows multiple CPU threads to handle different queues on the Network Interface Card. This assists to improve NIC throughout and reduce latency under heavy load,
- NIC packed virtqueues - merges multiple network ring queues into a single ring queue. This reduces memory and CPU overhead of virtual machine networking.
- IOThreads - Enables handing off disk IO to a dedicated thread handler. Improves disk I/O and helps to prevent CPU thread pauses waiting for disk IO,
- IO driver policy - select from one of:
- native: Uses Linux AIO (Asynchronous I/O) without bypassing the file system layer.
- threads: Uses userspace thread pools to handle I/O requests. This is useful for compatibility but introduces higher CPU context-switching overhead under heavy loads.
- io_uring: The recommended, high-performance policy for modern virtualised environments. It bypasses legacy system calls for asynchronous I/O, significantly reducing CPU overhead and increasing IOPS throughput.
Give the VM a name and, optionally, a group - grouping VMs makes it easier to filter and manage them later, especially once you have more than a handful running.
SSH keypairs
Linux VMs are typically accessed using SSH key authentication rather than passwords. Before you create your first VM, it's worth setting up a keypair:
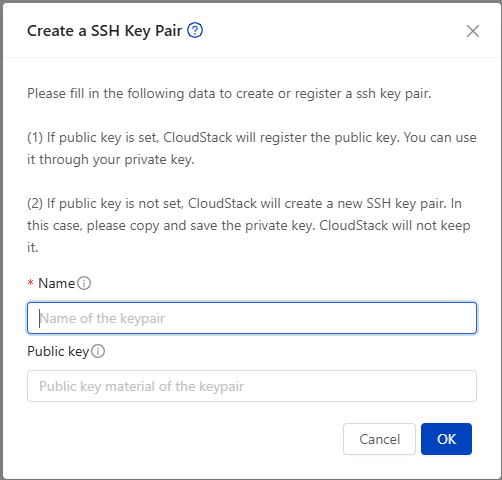
- Go to Compute → SSH Key Pairs and click Create a SSH Key Pair.
- Give it a Name (required) - this is how you'll identify the keypair when launching VMs later.
- Decide how you want the keypair generated:
- If you already have a keypair, paste your existing public key into the Public key field. The portal will register it, and you continue using your own private key to connect.
- If you leave Public key blank, the portal will generate a brand new keypair for you. Make sure to copy and save the private key when it's shown - it's only displayed once, and the portal does not keep a copy.
- Click OK to create the keypair.
- When you launch a new VM, choose the keypair you want injected into it. The portal handles adding the public key to the VM automatically on first boot.
- If you ever lose access, you can reset the SSH key on an existing VM from the portal without rebuilding it.
Starting, stopping and rebooting
VMs can be started, stopped or rebooted from the instance list or from the VM's detail page. Stopping a VM releases its compute resources but keeps its disks intact - on most plans, you're only billed for compute while a VM is running. Note that a VM's public IP may change if it's stopped and later restarted, unless it has a static IP or is attached to a persistent network.
Scheduling automated actions
Rather than starting or stopping a VM by hand, you can schedule recurring actions - start, stop, reboot, force-stop or force-reboot - to run automatically on a cron-style schedule. This is a straightforward way to cut costs on VMs that only need to run during business hours, or to build in a routine nightly reboot.
From the VM's Schedules tab, add a schedule with the action, a cron expression for when it should run, a timezone, and optionally a start and end date if the schedule shouldn't run indefinitely. Multiple schedules can be set on the same VM (for example, a start schedule on weekday mornings and a stop schedule on weekday evenings).
Accessing the console
Every VM has a built-in web console, accessible via the terminal icon in the VM's action toolbar (on the instance list or the VM's detail page). This opens a direct view of the VM's screen in a new browser tab, independent of SSH or the VM's network configuration.
The console is useful for:
- Troubleshooting a VM that isn't responding over SSH or has a broken network configuration.
- Watching the boot process, or interacting with the BIOS/UEFI screen and bootloader.
- Completing OS installation steps when booting from an ISO.
- Logging in directly when SSH keys aren't set up yet, or for OS types that use a console login.
Because the console connects straight to the VM's virtual display, it works even if the VM has no public IP, its firewall blocks SSH, or its network stack is misconfigured.

Resizing a VM (scaling CPU/RAM)
To change a VM's compute offering (e.g. move from 2 vCPU/4GB to 4 vCPU/8GB), open the VM and choose Scale VM, then select a new compute offering.
If you need VMs to be added or removed automatically based on demand rather than managed one at a time, see AutoScaling groups in VPC & Advanced Networking. This requires a template that's specifically prepared to boot straight into a working application with no manual setup - see Preparing a template for AutoScaling before relying on it.
Reinstalling a VM from its template
If a VM's root disk needs to go back to a clean state - for example, a botched in-place upgrade - you can reinstall it from the same template or ISO it was originally deployed from, without rebuilding the VM from scratch. This destroys and recreates the root disk only; the VM keeps its name, IP address and any attached data volumes. It's equivalent to reformatting the OS disk and starting the install over, not a full rebuild.
This is destructive to anything on the root disk - back up anything you need from it first (see VM Backups & Snapshots).
Renaming and changing OS type
You can update a VM's display name, its group, or its recorded OS type from the VM's settings - this is useful if the OS type was set incorrectly at creation time and is affecting driver/tooling compatibility. Changing the OS type doesn't reinstall anything; it just updates how the platform treats the VM (e.g. which guest tools it expects).
Affinity groups
Affinity groups let you influence which physical hosts your VMs land on:
- Affinity groups keep VMs together on the same host - useful for keeping VMs together to minimise latency between machines. Typically only useful for extremely latency-sensitive applications.
- Anti-affinity groups keep VMs apart on different hosts - useful for spreading replicas of the same service so a single host failure doesn't take down all of them.
Create an affinity group before deploying your VMs, then attach VMs to it either at deploy time or afterwards via Change Affinity Group. You can remove or delete an affinity group when it's no longer needed.
User data and metadata
You can pass custom user data (such as a cloud-init script) to a VM at deploy time, which the guest OS can read on first boot to run setup commands automatically. If you need to change the user data after deployment (for example, to re-run a provisioning script), you can update it and then reset it on the VM - this typically requires a reboot to take effect.
Importing and unmanaging
If you have an existing VM or volume outside of Lightspeed Cloud's management (for example, migrated infrastructure), it can be imported so the platform manages it going forward. Conversely, "unmanaging" a VM or volume removes it from platform management while leaving the underlying disk/VM untouched - useful if you need to migrate it elsewhere.
Contact Lightspeed Hosting about your requirements for direct importing of VMs, as it's typically more straightforward to build and migrate than to import.
Deleting a VM
Deleting a VM is destructive - it removes the VM and, depending on the option chosen, its attached volumes. Deleted VMs typically sit in an "Expunge" queue for a short grace period before resources are fully released, but don't rely on this as a backup strategy - always take a snapshot or backup first if there's any chance you'll need the data (see VM Backups & Snapshots).
To guard against deleting a VM by accident, you can turn on delete protection from the VM's settings - while enabled, both the portal and the API will refuse delete requests for that VM until protection is turned off again.